Table of Contents
- 1 Tools and Materials Required
- 1.1 Step-by-step Procedures
- 1.2 Step I: Put on the right protective gears
- 1.3 Step II: Prepare the chainsaw for the sharpening exercise
- 1.4 Step III: Set the file guide appropriately
- 1.5 Step IV: Place the sharpening file at its correct position
- 1.6 Step V: Check the filing angle
- 1.7 Step VI: Sharpen the chainsaw
- 1.8 Step VII: Turn the other side
- 2 FREQUENTLY ASKED QUESTIONS (FAQs)
- 2.1 1.Question: What angle do you sharpen a chainsaw?
- 2.2 2.Question: What size of the file is great for the .325 chain?
- 2.3 3.Question: HOW MUCH DOES IT COST FOR YOU TO SHARPEN MY CHAIN PROFESSIONALLY?
- 2.4 4.Question: How do you measure the pitch of a chainsaw?
- 2.5 5.Question: How much does a knife sharpening cost?
- 3 CONCLUSION
[As an Amazon Associate I earn from qualifying purchases. Learn more]
Is the blade of your chainsaw dull or blunt? Does it buck its way through the materials you use it to cut? Do you experience unnecessary strains while attempting to cut the wood in pieces? Your answer lies in sharpening the chainsaw. It is only in this way that you get to reinvigorate the equipment and let it achieve its purpose. We are here to guide you in doing just that.
 Tools and Materials Required
- A pair of gloves
- Protective eye wear
- Chainsaw filing kit
- Chainsaw chain
Step-by-step Procedures
Step I: Put on the right protective gears
A typical sharpening exercise entails the release of many particles and sawdust which might impact your eyes negatively. It is hence in your best interest and standard practice for that matter to shield your body from these issues.
In particular, care for your eyes as they are the most delicate and vulnerable. Put on some protective eyewear to do so. Then, wear a pair of gloves to shield your hands from intense friction which ordinarily arises in the course of sharpening. Though not a must, you might want to wear an apron to shield your clothes.
Step II: Prepare the chainsaw for the sharpening exercise
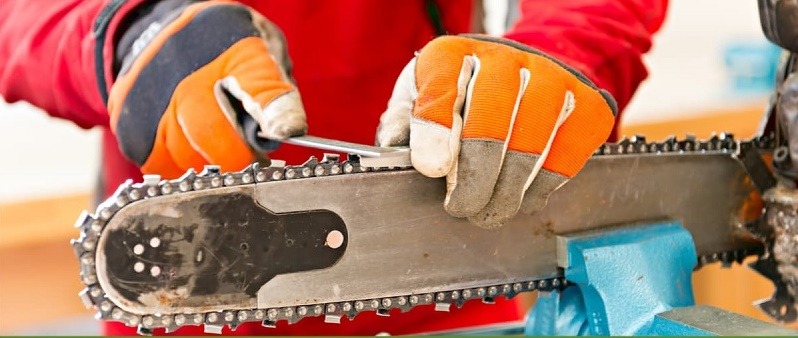
Now move on to prepare the chainsaw for the subsequent sharpening exercise. Clamp the chainsaw bar in a bench vise. You will have to engage the chain brake to be able to do so. Release the brake so as to rotate the chain manually.
Step III: Set the file guide appropriately
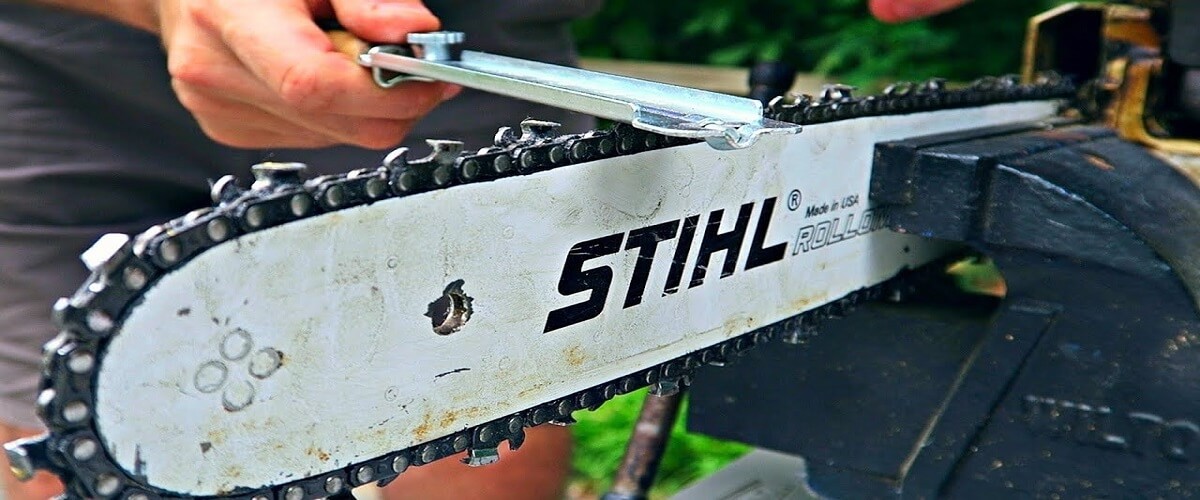
Set the file guide appropriately. The best place to fix it is over the cutter and in the gullet area. This is the portion of space which exists in between the cutter and the depth gauge. Be certain that the file guide comprises two points of contacts. One of these should be on the top of the cutter plate whereas the other two on the depth gauge.
Step IV: Place the sharpening file at its correct position
You are now ready to commence sharpening the chainsaw. Place the sharpening file at its correct position. Hold it in such a way that 1/5 inches or roughly 20% of its diameter are located above the top plate of the cutter. The use of the Oregon file guide is the most effective manner of holding the file in the stated position.
Step V: Check the filing angle
Examine whether the top plate of the filing angle is parallel to the chainsaw center line or not. While this is optional, some kinds of filing tasks will inevitably require that you do this. Needless to say, you will have to make appropriate adjustments if you spot any disparities.
Step VI: Sharpen the chainsaw
You now have to commence sharpening the chainsaw. As a general rule, you should start off with the cutter which has the most damage. Use steady and even strokes to apply the necessary force. Also, file from the inside to the outside of the cutter for best results. Stretch the file to its full length to get rid of any damages. Make it a point of counting the number of file strokes for the sake of consistency.
To know whether the outcome is great or not, check the appearance of the cutter. For best results, the outcome ought to possess some shiny and silver appearance. Each cutter should ideally also be of the same length. Make any adjustments to see to it that this is the case.
Step VII: Turn the other side
After you are through with one side, turn to the other side of the chainsaw. Repeat the entire process stated above. Remember to see to it that the lengths of the cutters are equal all the time. You are now good to go!
FREQUENTLY ASKED QUESTIONS (FAQs)
1.Question: What angle do you sharpen a chainsaw?
Answers: 30° has been identified as the best angle to sharpen the chainsaws. You will put in less effort yet obtain better outcomes faster. At the same time, you will also keep yourself off the numerous damages and injuries which potentially arise.
2.Question: What size of the file is great for the .325 chain?
Answers: The most recommended file size is 5/32 inches. It is compatible with the chain not to mention its efficacy in ridding it of undesirable debris.
3.Question: HOW MUCH DOES IT COST FOR YOU TO SHARPEN MY CHAIN PROFESSIONALLY?
Answers: In case you opt to take your chainsaw to a commercial sharpener, be ready to part with $13- $16.00. The actual price depends on the number of cutters and the sheer size of the saw.
4.Question: How do you measure the pitch of a chainsaw?
Answers: Ascertain the distance between the three consecutive rivets which make up the saw and divide this number by 2. FYI: The rivets are the small rounded pegs or studs which hold the constituent segments in place.
5.Question: How much does a knife sharpening cost?
Answers: This depends mainly on the size of such a knife. The standard four-inch paring knife goes for around $5-$7, whereas the standard 8-inch chef knife costs around $6-$10.
CONCLUSION
You have to exercise great caution while sharpening or maintaining your electric chainsaw. The entire exercise is potentially risky as it may predispose you to shocks, lacerations, incisions, and prickles in your eyes, to mention but a few! All in all, it is not so complicated a task. As such, even a starter will find it quite simple to undertake.

